- Most editing time is lost to disorganisation and indecision, not the cutting itself.
- A reusable template, keyboard shortcuts, and a no-second-guessing first pass save hours.
- Editing in separate passes removes constant context-switching.
- Batching similar tasks across videos is how creators sustain a regular schedule.
Editing speed is the difference between publishing once a month and once a week, and a regular schedule is one of the biggest factors in growing a channel. Yet the editors who turn videos around fastest are almost never faster typists or owners of more powerful computers. They have simply removed decisions and friction from their process. This is a complete workflow system for editing faster without sacrificing quality, drawn from production environments where predictable turnaround is the job. It applies whether you are cutting Shorts or twenty-minute videos, and it complements the broader advice in our YouTube editing guide.
1. Start From a Template
Never start from an empty project. Build a master template once and duplicate it for every new video. Your template should already contain your intro and outro, your lower-third and title presets, your music and sound-effects folders, your export presets, and a clean bin structure for organising footage. Setting these up fresh each time can quietly cost 30 to 45 minutes before you make a single cut. With a template, that time drops to seconds, and your projects stay consistent because every video inherits the same structure.
2. Commit to Keyboard Shortcuts
Learning a small set of keyboard shortcuts can realistically halve your editing time. The mouse is precise but slow; every trip from keyboard to mouse and back is friction that adds up over thousands of actions in a single edit. Prioritise the essentials first: blade or split, ripple delete, set in and out points, and play/pause. Keep one hand on the keyboard at all times and use the mouse only when you genuinely need precision. Within a week the shortcuts become muscle memory and the speed gain is permanent.
3. Edit in Passes
Trying to cut, color, caption, and sound-design all at once forces your brain to switch contexts constantly, and context-switching is where time silently disappears. The professional alternative is to work in distinct passes, each with a single goal, so you stay in one mode of thinking at a time.
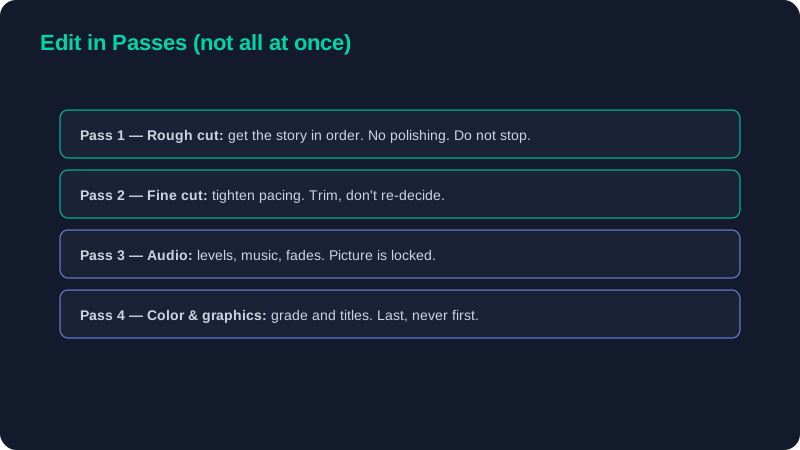
| Pass | Goal | Rule |
|---|---|---|
| 1. Rough cut | Get the story in order | No polishing — do not stop to fix anything |
| 2. Fine cut | Tighten pacing | Trim, do not re-decide the structure |
| 3. Audio | Levels, music, fades | Picture is locked before you start |
| 4. Color & graphics | Grade and add titles | Always last, never first |
4. Kill Indecision on the First Pass
The largest hidden time sink in editing is not any task — it is re-deciding. Beginners trim a cut, undo it, try again, second-guess, and repeat, turning a one-hour edit into a four-hour one. The fix is a strict rule for your rough-cut pass: make a decision and move on. Do not allow yourself to undo or perfect anything on the first pass; that is what the fine-cut pass is for. Knowing you will refine later frees you to assemble quickly, and quick assembly preserves the momentum and overview that make the rest of the edit easier.
On the rough-cut pass, ban yourself from the undo command entirely. If a cut is slightly wrong, leave it and keep going. You will fix it in seconds on the fine-cut pass with fresh eyes — and you will be astonished how often the "wrong" cut was actually fine once you saw it in context.
5. Batch and Automate
If you publish multiple videos a week, batching similar tasks across them is a major efficiency gain. Record all your intros in one session, generate all your captions together, and queue exports to run overnight. Let AI handle the genuinely repetitive work — transcription, silence removal, and first-pass captions — as covered in our AI software guide, then spend the time you save on the creative decisions that only you can make. Batching works because it eliminates the setup and mental warm-up cost of switching between different kinds of task.
6. Set Up Your Environment
Finally, the conditions you edit in affect your speed more than most people admit. A fast timeline — achieved with proxies and render caching, as described in our advanced techniques guide — keeps you in flow instead of waiting on playback. Organised, clearly labelled footage means you are never hunting for a clip. A second monitor for your timeline and preview reduces constant window-switching. And a defined stopping point for each session prevents the open-ended tinkering that makes edits expand to fill all available time. None of this is glamorous, but together these conditions are what let fast editors stay fast.
Editing faster is mostly about doing fewer things at once, more deliberately: start from a template, drive with the keyboard, work in passes, decide once, batch the repetitive work, and edit in an environment built for flow. Apply this system consistently and a video that used to take a full day will take an afternoon — without any drop in quality. To put the saved time to good use, the Shorts editing guide shows how to turn that efficiency into a steady stream of short-form content.