- Advanced editing is about decisions — rhythm, motivation, and contrast — not about stacking effects.
- Speed ramping, match cuts, and audio-led editing are the techniques viewers read as "professional".
- A node-based color workflow keeps grades consistent and non-destructive across an entire project.
- Proxies and render caching are what turn a stuttering timeline into a fast, paid-work-ready one.
Once you are comfortable with the fundamentals of cutting, timelines, and audio, the distance between an amateur edit and a professional one stops being about which software you own and starts being about the decisions you make inside it. In more than a decade of cutting branded content, documentary segments, and long-form YouTube videos, the pattern has been remarkably consistent: the editors who stand out are rarely the ones with the most plugins. They are the ones who understand why a particular cut lands and another one falls flat. This guide breaks down the advanced video editing techniques that actually move the needle on perceived quality, with the reasoning behind each one so you can apply the principle rather than just copy a setting.
1. Motivated Editing: Cut on Action and Intent
The single biggest upgrade most intermediate editors can make is to stop cutting on silence and start cutting on motivation. Every cut should answer a question the viewer is already asking: "What is she looking at?", "What happens next?", "What does that button actually do?" When a cut answers a live question, it feels invisible, because the viewer's attention was already travelling in that direction. When a cut answers no question, the viewer notices the edit itself instead of the story — and noticing the edit is exactly what breaks immersion.
In practice, motivated editing means cutting on movement. A head turn, a hand reaching for an object, a step forward, a glance off-screen — each of these carries the eye across the cut and hides the join. This is the mechanical reason action sequences can sustain dozens of cuts per minute while a static interview cannot: motion is constantly giving the editor permission to cut. Train yourself to scrub footage looking for these motion beats, and mark them. They become your natural edit points.
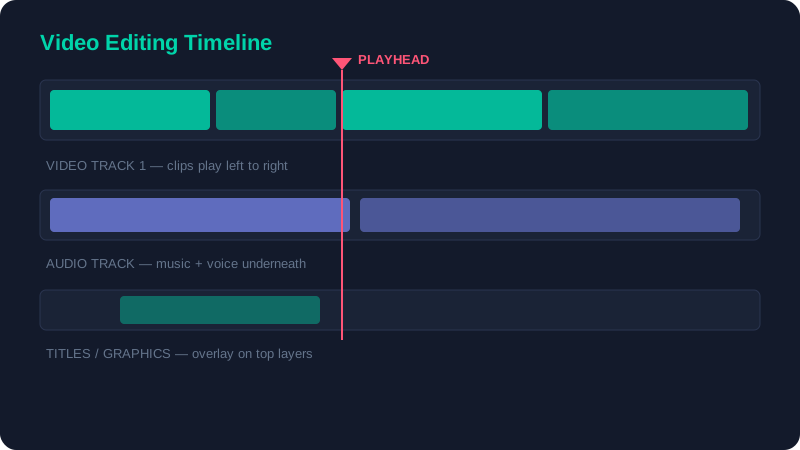
The 50% rule for trimming
A reliable discipline when refining a cut: once a shot has delivered its information, ask whether you can remove the back half of it. Most intermediate editors hold shots roughly twice as long as the edit needs. Trimming aggressively keeps the energy up and forces every frame to earn its place, which is one of the quiet hallmarks of professional pacing.
2. Speed Ramping and Time Remapping
Speed ramping — smoothly accelerating or decelerating a clip rather than hard-switching between speeds — is one of the most recognisable "pro" moves in modern editing. The detail most tutorials skip is that a ramp needs optical-flow or frame-blended interpolation to stay smooth once you slow footage below its native frame rate. Without it, slow motion stutters because there simply are not enough real frames to fill the time.
How to ramp cleanly
- Shoot at a higher frame rate than your timeline — for example 60fps footage on a 24fps timeline — so you have headroom to slow clips down with real frames.
- Apply easing to the speed keyframes so the change accelerates and decelerates instead of snapping between speeds.
- Enable optical-flow interpolation only on the ramped section. It is processor-heavy and can introduce warping artefacts on fast, chaotic motion, so use it surgically.
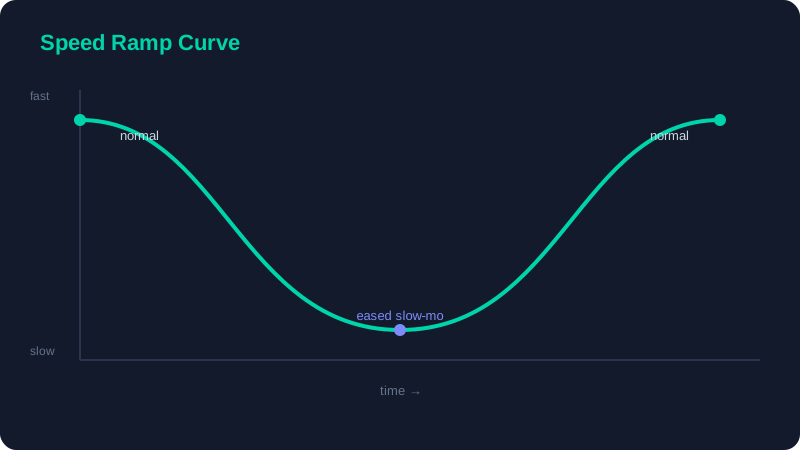
Where does a ramp belong? Reserve it for moments of emphasis — the peak of a jump, the reveal of a product, the beat drop in a music section. Ramping everything dilutes the effect. One well-placed ramp per sequence reads as intentional; five reads as a preset.
3. Match Cuts and Invisible Transitions
A match cut links two shots that share a shape, a motion, or a composition, so the edit feels like a single continuous idea rather than a jump between two clips. A whip-pan that lands on a new location, a circular object that becomes a wheel, a hand passing across the lens that wipes to the next scene — these are not gimmicks, they are how professionals move through time and space without a clumsy dissolve.
The key to match cuts is that they are usually planned during the shoot, or at least discovered by scanning your footage for accidental matches you can exploit. When you import a project, spend ten minutes looking for shots that share a dominant line or a moving element. Those pairs are your transition opportunities. Keep them in a dedicated bin so you can find them when an edit refuses to flow.
Build a "stingers" bin of whip-pans, light flashes, lens passes, and object wipes pulled from your own footage. When two shots stubbornly refuse to cut cleanly, a half-second motion transition from that bin almost always rescues the edit — and because it is your own footage, it stays consistent with the rest of the video.
4. Audio-Led Editing for Rhythm
Professional editors frequently build the audio spine first — music, voiceover, and the key sound effects — and then cut the picture to it. This is the inverse of how most intermediate editors work, and it is the reason pro edits feel rhythmic while self-taught edits often feel arbitrary. When the audio leads, every visual cut has a reason to exist at that exact frame.
Place beat markers on your music track, then let the visual cuts land on or a frame or two before the beat. Cutting slightly ahead of the beat (rather than exactly on it) often feels more natural, because the eye registers the new image just as the ear registers the beat. Even a talking-head video benefits: trimming breaths and dead air to a subtle internal rhythm keeps energy high without the viewer ever knowing why.
This technique pairs directly with the multimedia layering approach covered in our multimedia editing tutorial, where sound design and graphics are timed to the same beats for a cohesive result.
5. A Node-Based Color Workflow
Color grading is where an edit gains its mood, and a node-based approach is what keeps that mood consistent across dozens of shots. Available free in DaVinci Resolve, nodes let you separate each correction onto its own layer so changes stay non-destructive and easy to copy between clips.
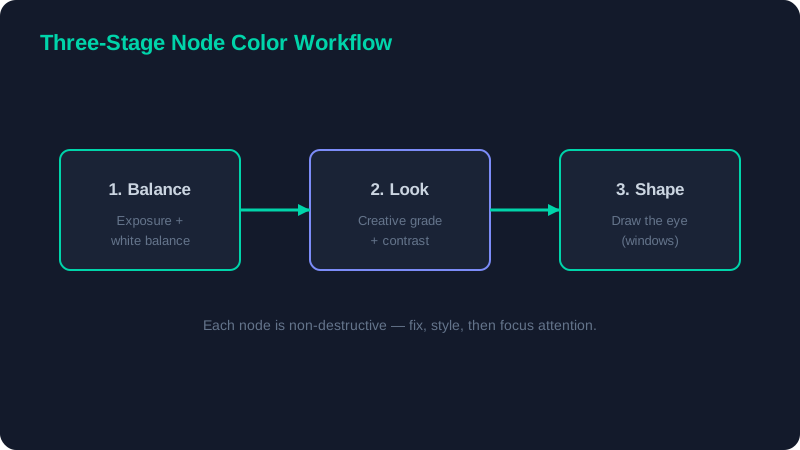
A reliable three-stage grade
- Balance node: fix exposure and white balance first so every shot looks neutral and technically correct. This is the foundation; never skip it to chase a look.
- Look node: apply your creative grade here — the contrast curve, the color cast, any film emulation. Because it sits on its own node, you can dial it back or copy it to other clips in one move.
- Shape node: use a window or qualifier to draw the eye, gently brightening faces or darkening the edges of the frame. This is the difference between a flat grade and one that guides attention.
Matching shots is the real test of a grade. Put two clips from the same scene side by side and correct them on the balance node until skin tones and whites agree. Only then apply the shared look node. Audiences rarely consciously notice good color, but they instantly feel mismatched shots as "cheap".
6. Using Contrast to Direct Attention
Beyond color, contrast in every form is how an editor controls where the eye goes. Contrast of brightness (a lit face against a dark background), contrast of motion (one moving element in a still frame), contrast of focus (a sharp subject against a soft background), and contrast of pace (a held shot after a flurry of fast cuts) all pull attention. Advanced editing is, in large part, the deliberate management of these contrasts so the viewer always looks exactly where you want them to.
A practical application: after a rapid montage, hold a single calm shot a beat longer than feels comfortable. That sudden drop in pace creates emphasis and gives the audience a moment to absorb what they just saw. Editors who never vary their pace produce videos that feel relentless and, paradoxically, monotonous.
7. Performance: Proxies and Render Cache
None of the techniques above matter if your timeline stutters while you work. Two settings solve the vast majority of playback problems, and understanding when to use each will save you hours.
| Technique | What it solves | When to use it |
|---|---|---|
| Proxy media | Choppy playback on 4K or RAW footage | Any project above 1080p on a laptop or older machine |
| Render cache | Lag on effect- or grade-heavy clips | Color grades, compositing, speed ramps, stacked effects |
| Optimised timeline FPS | Judder from mixing frame rates | Combining 24p, 30p, and 60p source clips |
| Background export | Being unable to keep working during a render | Long timelines you want to deliver overnight |
Generate proxies once at the start of a project, edit against those lightweight files, and switch back to full resolution only at export. On most machines this single habit turns an unusable 4K timeline into a perfectly smooth one. If you are still choosing which application handles grading and ramping fastest, our comparison of AI-assisted editors and the broader software roundup cover the performance differences in detail.
8. How to Practise These Deliberately
Reading about technique changes nothing until you drill it. The fastest way to internalise everything above is to take a single 60-second sequence and re-cut it four times, each pass focusing on one skill: once cutting only on motion, once building the audio spine first, once adding a single speed ramp and one match cut, and once grading with a three-node setup. Comparing the four versions teaches you more than four different projects would, because the footage is constant and only your technique changes.
Advanced editing is not a collection of secret effects. It is a set of repeatable decisions — cut on motivation, lead with audio, manage contrast, grade with intent, and keep the timeline fast enough to stay in flow. Master those, and the "professional" quality everyone chases stops being mysterious and becomes something you can produce on demand. When you are ready, the multimedia tutorial shows how to layer graphics and sound design on top of this foundation.